Apache Hop GUI remote pipeline engine setup
Introduction
Section titled “ Introduction”The Hop GUI enables you to run pipelines or workflows remotely using the Hop Server. By configuring and managing your projects, environments, and pipelines within the GUI, you can seamlessly execute and monitor them through the Hop Server.
Don’t let the slightly dated user interface deceive you. Give Hop a chance because, beneath the surface, it’s a highly powerful and efficient data integration platform. Even though I’ve experimented with various innovative BI software, I consistently return to Pentaho, and now Apache Hop, for building complex ETL processes.
Requirements
Section titled “ Requirements”Make sure the Hop Server is running and you can access the Hop Server status. Login with your username and password. This will give you an overview of the pipelines and workflows after these are executed through the server.
To build pipelines and workflows, you need to download the Hop GUI. Alternatively, you can use Hop Web (currently in development). I’ll be using the Hop GUI on Windows and starting it with hop-gui.bat.
-
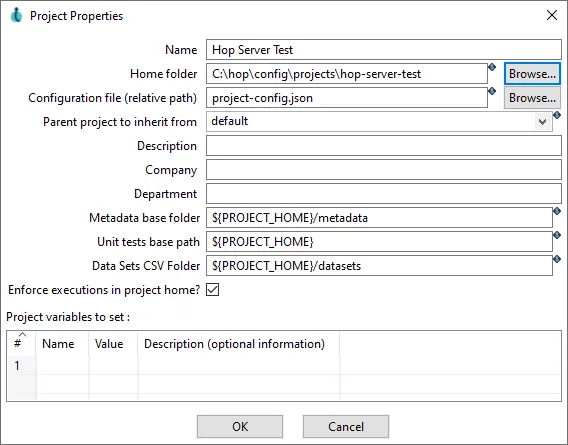
Create a new project:
-
(optional) Create lifecycle environments if necessary. For each project I create a
developmentenvironment andproductionenvironment by default. You can configure variables for each environment. For example, if I want to connect to a sandbox API I use the development environment.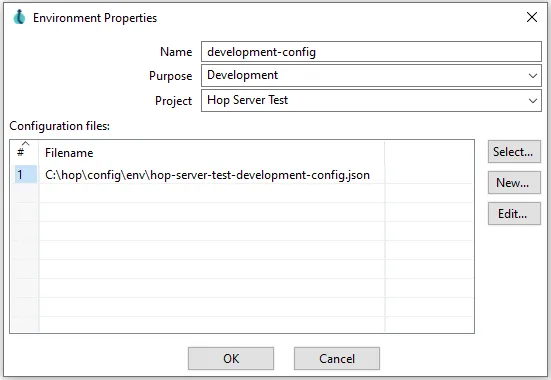
-
Click the
metadatabutton all the way left and in the list right-clickHop Serverand choose forNew. Enter the following:- Server name: for example
Ubuntu VM Hop Server - Hostname or IP address: the IP of your Docker host
- Port: the Docker port, for example
8182 - Username: your username, for example
admin - Password: your password, for example
adminClose theNew Hop Servertab and confirm you want to save the new Hop Server. Now the newly created server is listed underHop Server
- Server name: for example
-
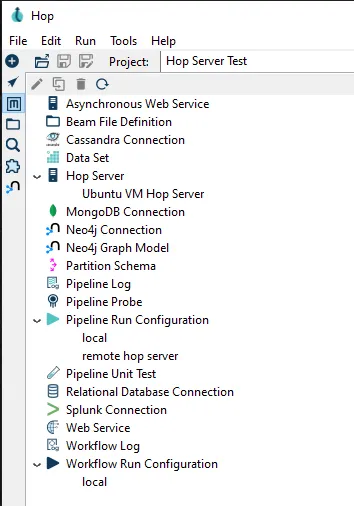
In the same metadata list we are now going to add a new
Pipeline Run Configuration. Right-clickPipeline Run Configurationand choose forNew. Enter the following:- Name:
remote hop server - Engine type:
Hop remote pipeline engine - Hop server: choose the server you just created, for example
Ubuntu VM Hop Server - Run configuration:
localClose theNew Pipeline Run Configurationtab and confirm you want to save the new configuration. Now your metadata looks like this:
- Name:
-
Click the
Data Orchestrationbutton all the way left (above the metadata button) and click theOpen...button -
Navigate to the transforms folder of the samples project. In my case the full path is:
C:\hop\config\projects\samples\transforms -
Open (double-click)
fake-data-generate-person-record.hpl -
Now click the
Start execution of the pipelineblue play button under the tabfake-data-generate-person-record -
You will see the
Run Optionswindow. Selectremote hop serverasPipeline run configurationand click on theLaunchbutton: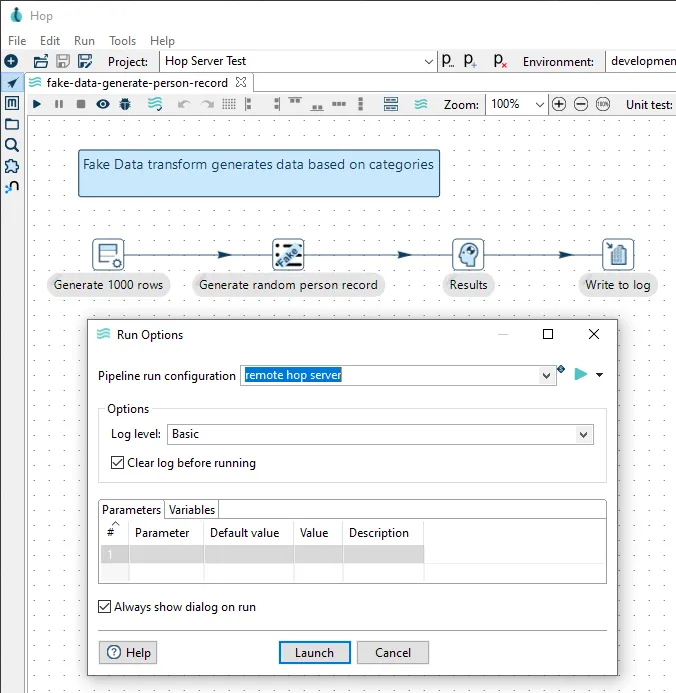
-
The
Results Panewill now open at the bottom of the screen. Under theLoggingtab you can see the output, in this case the random person records -
Now look in the browser at the server status (example url:
http://<Hop server IP>:8182/hop/status). You will see that the pipeline is now added with statusFinished:
You can use the remote workflow engine in a similar way. I am also very curious about other possibilities to use the Hop Server. My next experiment will be running a Hop Web Service.
No comments found for this note.
Join the discussion for this note on Github. Comments appear on this page instantly.